
Embarking on the journey of discovering how to make a website has become notably more straightforward in recent years. The process is not only more cost-effective but also faster than ever before. By following this comprehensive tutorial, replete with easy-to-follow steps, accompanied by screenshots and video walkthroughs, you’ll successfully create your personalized website powered by WordPress. This marks the initiation of a blog, dedicated to guiding you on how to make a website and helping you navigate the intricacies of this essential skill in the digital age.
Step 1. Choose a Domain Name
Your domain name is the address people type in to access your website. Choose a name that is easy to remember and reflects the purpose of your website.
Check Domain Name Availability
Step 2: Get Hosting with free Domain
Upon determining your site’s name, the subsequent action is to secure hosting and a domain. The domain represents your site’s identity (www.sitename.com), while hosting ensures your website is accessible on the internet.
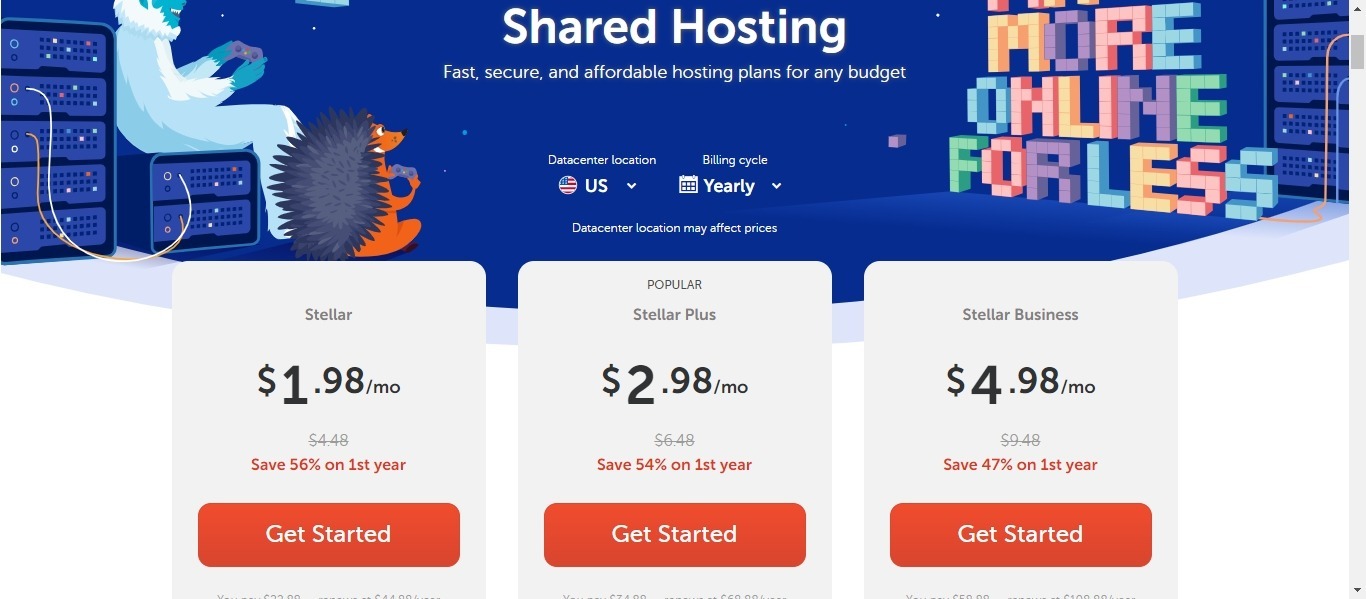
I highly recommend Namecheap as a hosting provider. They offer cost-effective solutions and boast nearly two decades of experience in the web hosting industry, providing support to some of the world’s most renowned websites. I prefer Namecheap due to their exceptional customer service, always available to assist with any technical challenges as you navigate the process of learning how to make a website.
When you visit the Namecheap website, we recommend selecting the Stellar Plus Hosting plan. From there, click on “Get Started.”
With the Namecheap Stellar Plus account, you enjoy the following benefits:
- Domain name
- Unlimited websites
- Unmetered SSD
- Unlimited mailboxes
- AutoBackup
- Website Builder
Step 3: WordPress Installation with Namecheap’s Auto Installer
After securing your hosting service, kickstart the process of crafting your website. Leveraging the user-friendly Softaculous automatic app installer, you can effortlessly install WordPress with just a few clicks.
Follow these step-by-step instructions to guide you through the process:
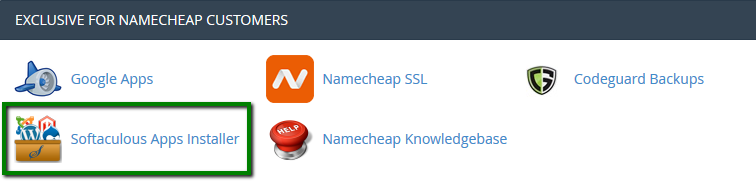
- Log in to your cPanel.
- Head to the “Exclusive for Namecheap customers” section and select the “Softaculous Apps Installer” menu:
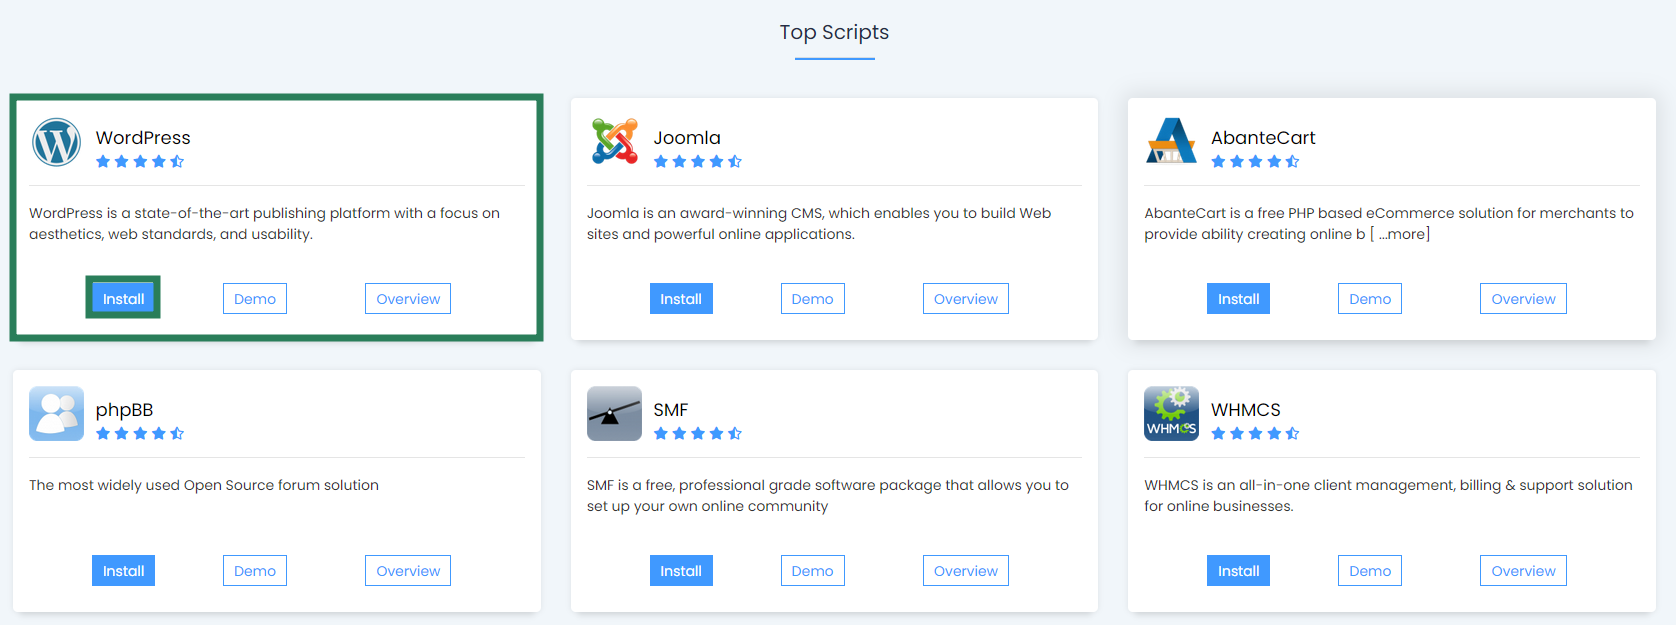
3. On the homepage, click Install under the WordPress icon:
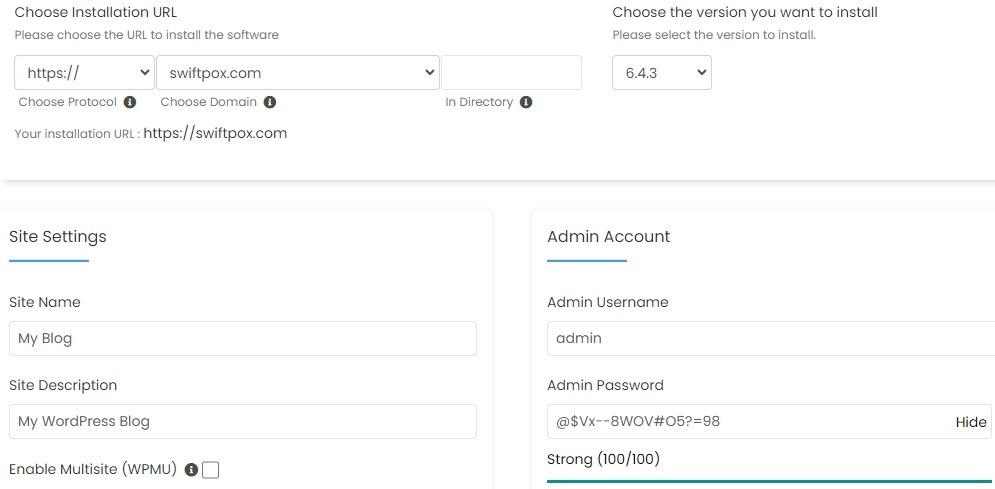
4. On the next page you will need to fill out the details of your WordPress installation.
Choose the domain you wish to install WordPress for.
- In the In Directory field you can specify the root folder for WordPress installation. By default, this field is empty, and it allows installing WordPress on yourdomain.com directly. If you wish to install it to a subfolder, like yourdomain.com/blog, simply type “blog” in this field.
- Choose the version of WordPress you want to install.
- Database Name can be left default.
- Table Prefix can also be left default wp_; however, due to security reasons it is better to change it, e.g., to ncwpsite_ .
- The Site Settings section should be filled out accordingly to your needs, though you can change it anytime later if required.
Make sure you set up secure and hard-to guess details in the Admin Account section:
5: Finalizing the WordPress Installation
Once you’ve configured the details, scroll down and click on the “Install” button.
After a brief moment, you’ll receive a confirmation message indicating that WordPress has been successfully installed:
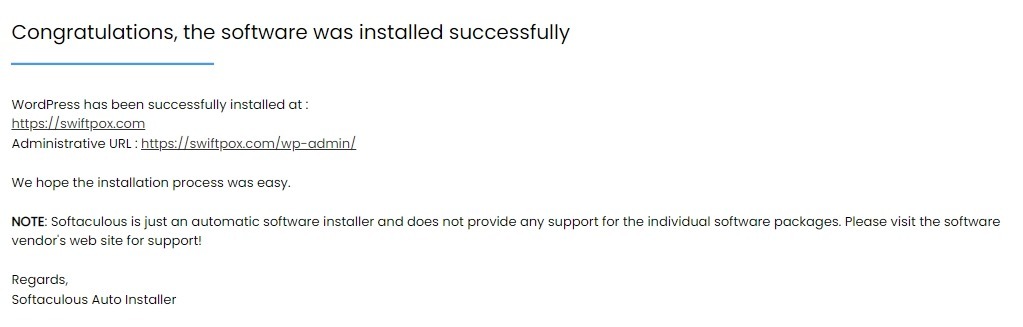
Feel free to proceed by logging into your WordPress Dashboard, where you can begin the process of working on your website.
Step 4:Choose your theme
Crafting a WordPress website involves a pivotal step: selecting a theme that aligns with your brand and offers a unique experience for your audience. It’s an integral part of the process when you’re learning how to create a website.
WordPress provides a diverse selection of 6230+ themes, spanning various categories from ecommerce to food and drink, ensuring you find the ideal match for your business.
Additionally, consider exploring premium themes to elevate your website’s design and functionality.
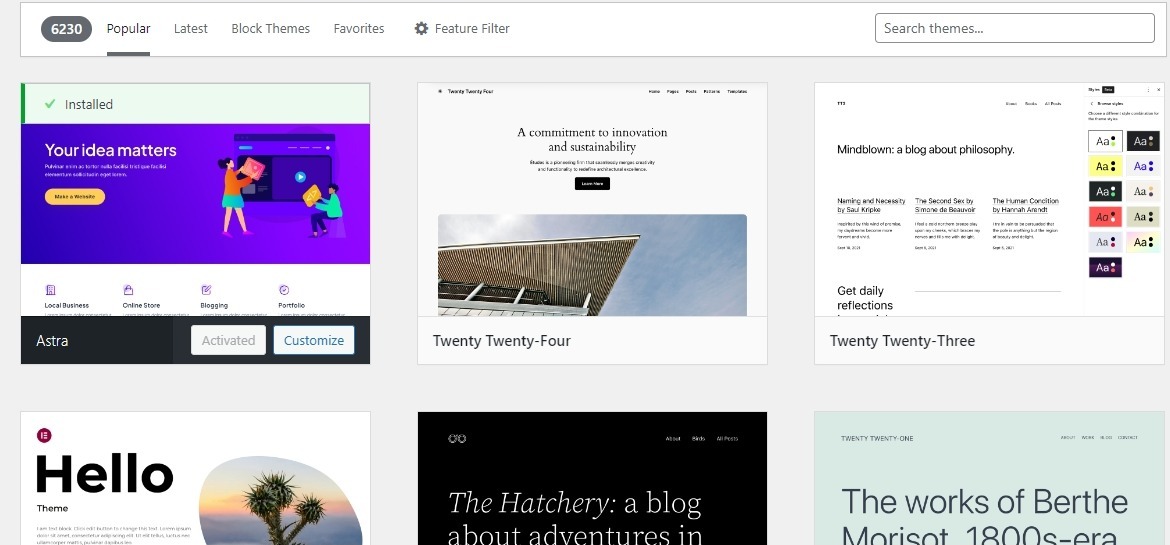
In the pursuit of choosing the best WordPress theme, we recommend opting for the “Astra WordPress theme.“
When selecting an optimal theme for your website, prioritize those that offer essential features necessary for building a robust online presence.
Whether your requirements include a custom header or an editor-style theme, it’s imperative to verify that your chosen theme incorporates these specific features. Utilize the “Tags” section as a valuable resource to identify the features offered by your theme.
Above all considerations, prioritize selecting a theme with responsiveness. Responsive themes are indispensable, ensuring your website seamlessly adapts to various devices. This guarantees a positive user experience for everyone, regardless of the device they use.
Step 5: Final Steps
1. Astra Plugin Installation
When working with the Astra theme, install the Astra plugin to easily import ready-made designs into your website, saving you time on starting from scratch.
2. Importing Demo Content
After installing the Astra plugin, simply click ‘see library’ to import demo content. Choose a design from the library that closely aligns with your vision for the final website.
3. Editing the Content
Once the design is imported, it’s time to customize and add your content. To edit any page on your site, navigate to the respective page and click “edit with Elementor.”
Congratulations!
You’re ready to launch!
If you’ve followed the steps in this guide, you should now have a fully-functional WordPress website!